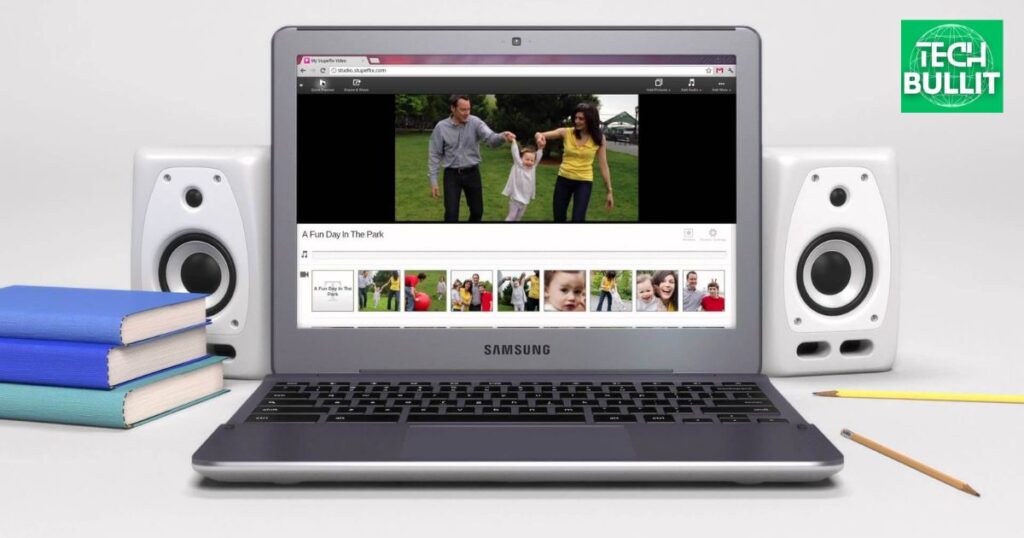
A Chromebook microphone is a built-in device that captures sound. It allows users to record audio, participate in video calls, and use voice commands. The microphone is an essential feature for communication and multimedia activities on a Chromebook. Users can enable or disable it as needed for privacy and convenience.
Plug in and let your voice be heard, turning your Chromebook into a hub of endless possibilities. Some people want to know where is the microphone on a chromebook? Experience the convenience of a built-in microphone, bringing a new dimension to your digital journey. Upgrade your Chromebook with this small yet impact tool and amplify your voice in the online realm. The microphone on a Chromebook opens doors to seamless interaction and immersive experiences.
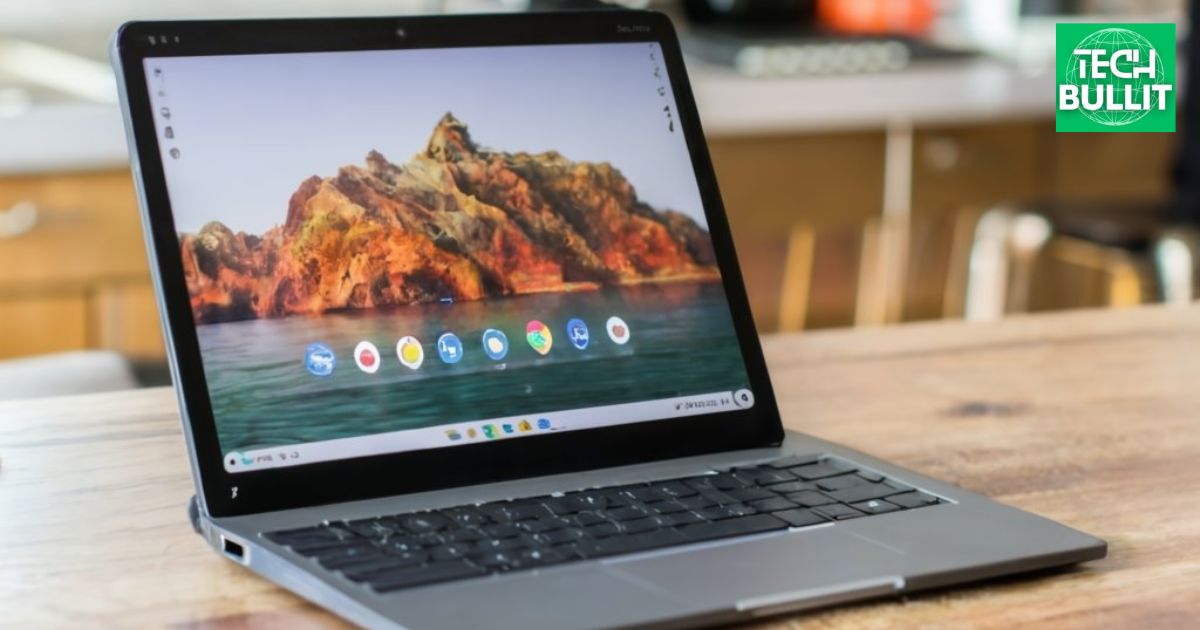
A microphone on a Chromebook is a built-in device that allows you to capture sound. It is commonly used for video calls, online classes, and recording audio. The microphone on a Chromebook is usually located near the camera or along the device’s edges. To use it simply open the app or platform that requires audio input and your Chrome book’s microphone will pick up your voice or other sounds
Locating the Microphone on a Chromebook
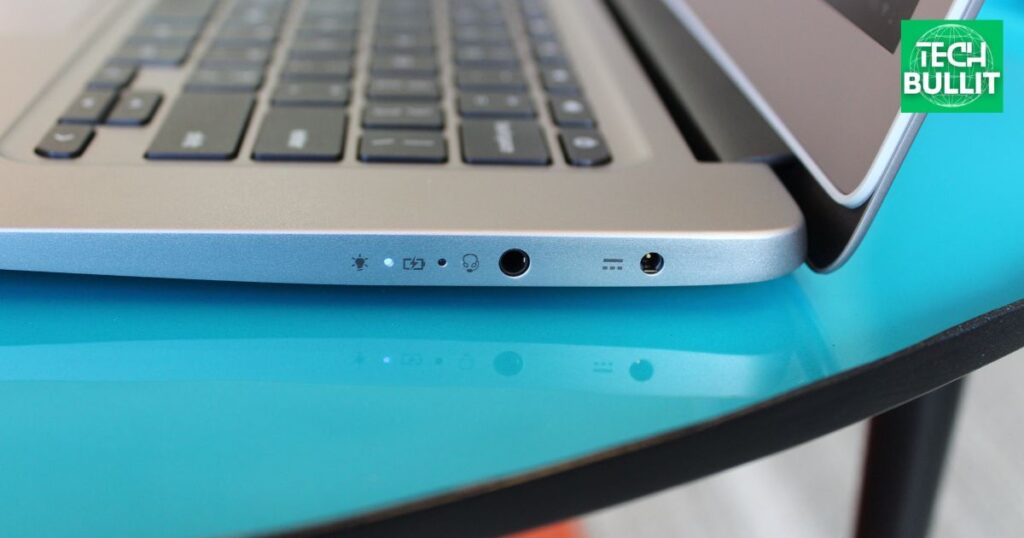
Finding the microphone on a Chromebook is simple. Look for a tiny hole usually located near the keyboard or on the sides of the device. It might have a small microphone icon next to it. Once you locate it, make sure it’s not covered, as covering it can affect sound quality. This microphone allows you to record audio, participate in video calls, and use voice commands on your Chromebook.
Understanding the Microphone on a Chromebook
The microphone on a Chromebook is a small but essential component that captures sound for various purposes. Typically, it is located near the keyboard or on the sides of the device. Recognisable by a small icon, the microphone enables you to engage in video calls, record audio, and use voice commands.
It’s important not to cover the microphone to ensure optimal sound quality. Familiarising yourself with its location and functionality enhances your overall experience when using audio features on your Chromebook.
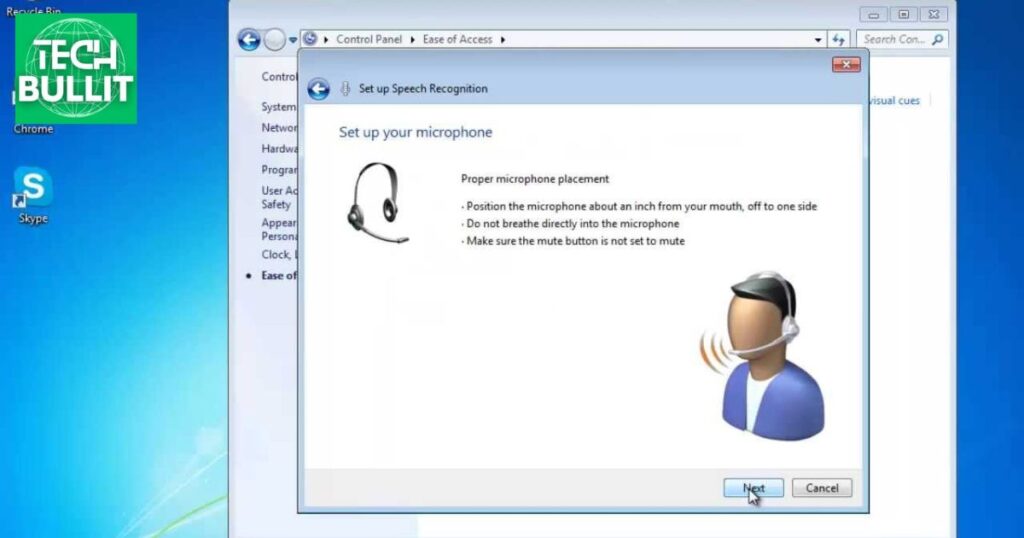
How do I allow Chrome to access my microphone?
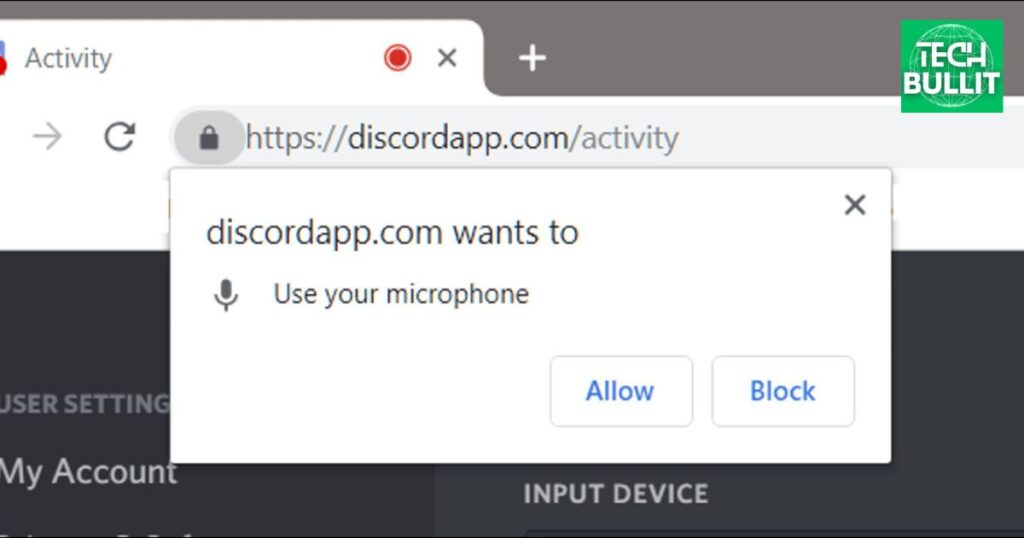
To allow Chrome access to your microphone, open the browser and click on the three vertical dots in the top right corner. Select “Settings” and navigate to “Privacy and security.” Click on “Site settings” and scroll down to find the “Microphone” section. Ensure that the microphone access is set to allow.
If needed manage exceptions for specific sites. After making changes refresh the page or restart Chrome to apply the settings. This simple process enables you to use your microphone for various online activities seamlessly.
How do I unmute the microphone on my Chromebook?
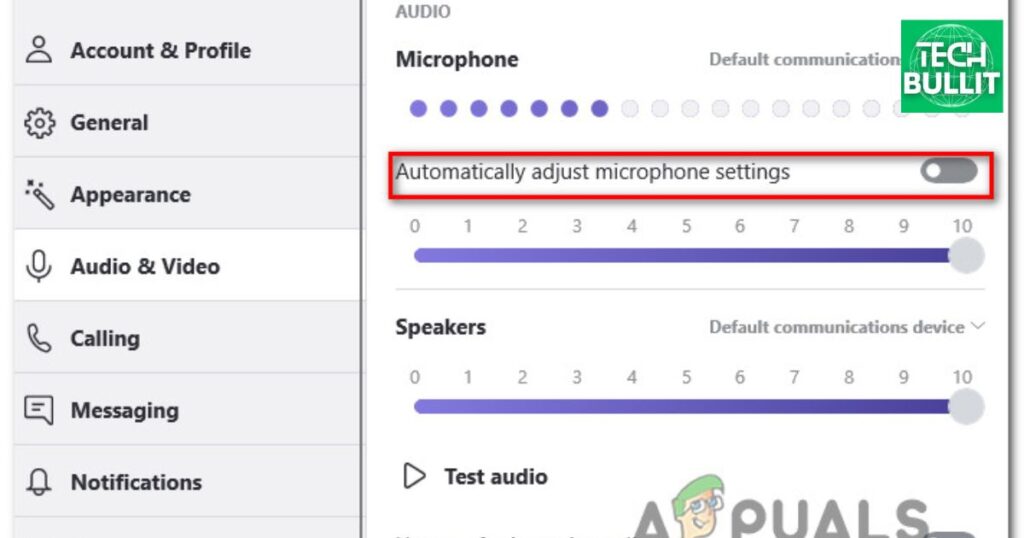
To unmute the microphone on your Chromebook, locate the volume control icon in the system tray at the bottom right of your screen and click on it. Inside the volume settings, find the microphone icon and check if it’s muted; if so, click on the microphone icon to unmute it.
Ensure there’s no crossed-out symbol indicating mute. Additionally, adjust the microphone volume as needed. If you’re using a specific application, verify its settings to make sure the microphone is not muted within that app.
These simple steps will swiftly unmute your Chromebook’s microphone allowing you to resume using it for various purposes.
How do I know if my Chromebook has a microphone?
To determine if your chromebook has a microphone, start by visually inspecting the device for a small hole near the keyboard or on the sides, as this is typically where the microphone is located. Additionally, consult the manufacturer’s documentation, user manual, or official website for information on your Chromebook’s specifications and audio features.
Check system settings by clicking on the clock, accessing “Settings,” and navigating to “Sound” or “Audio” settings, where the presence of a microphone option confirms its existence. Look for a microphone symbol on the keyboard, and test its functionality during a video call or recording to ensure the microphone is operational.
Using a combination of these methods will help you determine definitively whether your Chromebook is equipped with a microphone.
Tips for Optimal Microphone Performance on a Chromebook
Here’s a simple table outlining tips for optimal microphone performance on a Chromebook
| Tips | Description |
| Identify Microphone Location | Locate the built-in microphone on your Chromebook, usually found near the keyboard or along the device’s sides. Ensure it is unobstructed for clear sound capture. |
| Keep Microphone Area Clean | Maintain a clean microphone area to prevent dust or debris buildup, which can impact sound quality. Regularly check and clean the microphone opening. |
| Adjust System Microphone Settings | Access the system menu to adjust Chromebook microphone settings. Confirm that the microphone is enabled and set to an appropriate volume for optimal performance. |
| Check Application Settings | When using specific applications or during video calls, check and adjust microphone settings within the application to ensure it is configured correctly for your needs. |
| Securely Connect External Microphones | If using an external microphone, ensure it is securely connected to your Chromebook. Loose connections can result in sound issues. |
| Minimize Background Noise | Be mindful of your surroundings and minimize background noise during calls or recordings to enhance the microphone’s performance in capturing your intended audio. |
Implementing these tips will contribute to an improved microphone experience on your Chromebook.
Setting Up Default Microphone Usage
To set up default microphone usage on your Chromebook, start by clicking on the clock in the bottom right corner to open the system menu and then select “Settings.” Navigate to “Sound” or “Audio” settings and within that section look for an option to choose the default microphone. Select the desired microphone from the available options, ensuring it is enabled and set to an appropriate volume level.
This establishes the chosen microphone on your MacBook Air as the default input device, ensuring that it is automatically utilised in applications, video calls, and other activities requiring audio input.
Adjusting Microphone Sensitivity
To adjust microphone sensitivity on your Chromebook, access the system menu by clicking on the clock, then select “Settings.” Navigate to “Sound” or “Audio” settings, and look for an option related to microphone sensitivity or input gain. Adjust the slider or settings to increase or decrease sensitivity based on your preference.
This allows you to fine-tune the microphone’s responsiveness, ensuring optimal performance in various recording or communication scenarios.
Troubleshooting Microphone Issues
If your microphone isn’t working, check the physical connections first. Ensure it’s properly plugged into the correct port. Next, inspect the microphone for any damage or loose wires.
If everything looks fine, check your device’s audio settings to ensure the microphone is selected as the input device. Finally, consider testing the microphone on another device to rule out hardware issues.
Disable Chrome Extensions
To disable Chrome extensions, open the Chrome browser. Click on the three vertical dots in the top-right corner to open the menu. Select “More tools” and then click on “Extensions.” Here, you’ll see a list of your installed extensions. Toggle the switch next to each extension to disable them.
You can also unchecked the “Enabled” box for each extension. Disabled extensions will be grayed out, indicating that they are no longer active.
Log into Guest Mode
To log into Guest Mode on Chrome, open the Chrome browser. Click on your profile picture in the top-right corner. In the drop down menu, select “Guest.” This will open a new Chrome window in Guest Mode, allowing someone to use the browser without accessing your personal information or settings.
When they close the Guest Mode window, all browsing data will be deleted, providing a private and temporary session.
Connect an External Microphone
Connecting an external microphone is easy. First, locate the microphone jack on your device; it’s often labelled with a microphone icon. If using a USB microphone, insert it into an available USB port. For 3.5mm jack microphones, plug the connector into the microphone port.
Once connected check your device’s audio settings to ensure the external microphone is selected as the input device. You can usually do this through system preferences or settings. Test the microphone with a recording or communication app to ensure its functioning properly.
Try Alternate Software
If you’re facing issues with your current software, consider trying an alternate option. Search for alternative software that serves the same purpose and fits your needs. Download and install the new software, ensuring it meets your system requirements.
Transfer your data or settings from the old software if necessary. Testing the alternate software can help determine if the issue is software-specific or related to your system.
Factory Reset Your Chromebook
To factory reset your Chromebook open the Settings menu by clicking the clock in the bottom-right corner. Choose “Settings,” scroll down to “Advanced” and then select “Reset settings.” Click on “Power wash” and follow the prompts to reset your Chromebook to its factory state.
How to Activate Microphone on Chromebook?
To activate the microphone on a Chromebook, click on the clock in the bottom right corner and select “Settings.” Go to “Privacy and security” then “Site settings.” Under “Microphone” ensure its set to “Ask before accessing” or “Allowed” for the microphone to be activated.
How do I make my Chromebook mic better?
To improve your Chromebook’s microphone performance, ensure you’re in a quiet environment to minimize background noise. Adjust the microphone settings in “Settings” under “Privacy and security” to fine-tune sensitivity. Consider using an external USB microphone for enhanced audio quality if the built-in mic doesn’t meet your needs.
How to Test Camera and Microphone on Chromebook?
Testing the microphone on a Chromebook is simple. Plug it in and turn it on. Speak into the On A Chromebook microphone to check if it picks up your voice. Adjust the volume if needed. Listen to the playback to ensure clarity. If any issues arise, troubleshoot or try a different microphone.
Microphone Testing on Chromebook
For a quick and effective microphone test on your Chromebook, follow these steps. Open the Recorder app or a video conferencing tool, then record a short audio clip or join a test meeting. Speak into the microphone to ensure it captures sound accurately.
If needed adjust microphone settings in the system preferences for optimal functionality. This step-by-step guide ensures a thorough check of your Chromebook’s microphone.
Troubleshooting Camera Issues on Chromebook
When troubleshooting camera issues on a Chromebook, start by checking for any physical obstructions on the camera lens. Ensure that the camera is enabled in system settings. If the problem persists, update the Chrome OS to the latest version, as updates often include bug fixes.
Lastly if all else fails, consider power washing your Chromebook, which can resolve software related camera issues by restoring the device to its factory settings.
Chromebook Camera Settings
Optimizing your Chromebook camera settings ensures the best performance. Access camera settings through the Camera app or system preferences to adjust features like brightness, contrast, and resolution. Ensure that the camera is selected as the default device for applications using video.
Experiment with these settings to achieve optimal video quality and a better overall camera experience on your Chromebook.
Microphone Not Working on Chromebook
If your microphone is not working on your Chromebook, try these seven fixes. First, check for physical damage or obstructions. Ensure that the microphone is enabled in system settings and adjust input levels. Verify app permissions for microphone access and consider updating the Chrome OS.
If issues persist try power washing the Chromebook or using an external microphone to isolate the problem.
Restart Your Chromebook
To restart your Chromebook, click on the system tray in the bottom-right corner. Select the power icon and choose the “Restart” option. Wait for the Chromebook to reboot and resume normal operation.
Update Your Chromebook
To update your Chromebook, click on the system tray in the bottom-right corner. Select the gear icon for settings and then go to “About Chrome OS.” Click “Check for Updates” and follow any prompts to install the latest updates for enhanced performance and security.
Check Audio Input Settings on Chromebook
To check audio input settings on your Chromebook, click on the system tray in the bottom-right corner. Select the gear icon for settings and then navigate to “Sound.” Verify that the correct microphone is selected under the “Input” section. Adjust input levels if needed for optimal audio input settings on your Chromebook.
Disable Conflicting Extensions on Chromebook
To disable conflicting extensions on your Chromebook, open the Chrome browser. Click on the three vertical dots in the top-right corner, go to “More tools,” and select “Extensions.” Locate the extensions that might be causing conflicts, and toggle the switch to disable them. Refresh your browser or restart your Chromebook for the changes to take effect.
Enter Guest Mode on Chromebook
To enter Guest Mode on your Chromebook, click on the profile picture in the bottom-right corner. Select “Browse as Guest” from the menu. This allows temporary access without signing in ensuring a clean and private browsing session.
Try a Different App for Your Chromebook Microphone
If you’re experiencing microphone issues on your Chromebook, try using a different app to isolate the problem. Open another app that requires microphone input, such as the Recorder or a different video conferencing tool. If the microphone works in the new app, the issue may be app specific.
If the problem persists across apps, consider troubleshooting the Chromebook’s microphone settings or checking for hardware issues.
Reset Chromebook to Factory Settings with Power wash
To reset your Chromebook to factory settings using Powerwash, go to Settings from the system tray. Navigate to “Advanced” and then “Powerwash.” Follow the on screen instructions, and the process will restore your Chromebook to its default state, erasing all local data and settings. Remember to back up important data before initiating the Powerwash.
External Microphone Options for Chromebooks
Chromebooks support external microphones via USB or 3.5mm audio jack. USB microphones offer plug and play convenience, while 3.5mm microphones may need an adaptor for newer Chromebooks. Compatible options include USB condenser microphones or headset microphones for improved audio quality during video calls or recording.
Finding the Right External Microphone for Your Chromebook
When selecting an external microphone for your Chromebook, ensure compatibility through USB or 3.5mm audio jack options. USB condenser microphones offer easy plug-and-play functionality, while 3.5mm options may require an adaptor for newer Chromebook models. Consider your specific needs such as video conferencing or content creation, to find the right external microphone for optimal performance.
Connecting a Microphone to Your Chromebook
To connect a microphone to your Chromebook, locate the USB or audio port on the device. Most Chromebooks have a USB-C or USB-A port for connectivity. Once identified, simply plug the microphone into the port securely.
Your Chromebook should automatically recognise the microphone, allowing you to use it for various applications, such as video calls or voice recording. Check your settings to ensure the microphone is selected as the input device for a seamless audio experience.
Buying and Plugging a USB Microphone
When buying a USB microphone, ensure it is compatible with your device and has a USB connector. Simply plug the USB microphone into an available USB port on your computer. Your system should automatically recognise the microphone, enabling you to use it for recording or communication without any additional setup.
Selecting the External Microphone
To select an external microphone, connect it to your device, then go to your system settings. In the audio or sound settings, choose the external microphone as the preferred input device for clear and enhanced audio input.
Adjusting Audio Settings
To adjust audio settings on your device, navigate to the system settings and locate the sound or audio options. From there, you can modify volume levels, choose input/output devices, and customise other audio preferences according to your preferences.
How to enhance your mic’s audio quality
To enhance your microphone’s audio quality, first, ensure it is positioned correctly for optimal sound capture. Adjust the microphone settings on your device, tweaking factors like sensitivity and noise reduction. Consider using external software or apps designed for audio enhancement.
Additionally, investing in a quality pop filter or windscreen can minimise unwanted background noise and improve overall audio clarity.
Sit at the right distance from your device
Sit at an optimal distance from your device when using a microphone, typically around 6-12 inches. This ensures clear and balanced audio capture, minimising distortion and background noise for better communication or recording experiences.
Don’t talk directly into the mic
Avoid speaking directly into the microphone; instead, position it slightly off to the side. This helps prevent plosive sounds and ensures a more natural and distortion-free audio recording or communication.
Don’t speak too loudly or too quietly
Maintain a moderate speaking volume when using your microphone to avoid distortion. Adjust your voice to a level that is audible without overloading the microphone, ensuring clear and balanced audio output.
Use an external microphone (Bluetooth, USB, or headphone jack)
For improved audio quality, consider using an external microphone such as Bluetooth, USB, or one connected through the headphone jack on your device. External microphones often provide better clarity and noise reduction, enhancing your overall recording or communication experience.
Adjusting microphone settings
To optimize microphone performance, access your device’s settings and locate the audio or sound preferences. Fine-tune settings such as input sensitivity, gain, and noise reduction to ensure the best audio quality for your specific environment and usage.
My voice sounds crackly or there’s a ton of background static
If your voice sounds crackly or there’s excessive background static, try adjusting your microphone’s position and distance. Check for loose connections and consider using a pop filter to minimize unwanted noise. Additionally explore your device’s audio settings to adjust input sensitivity and reduce static for clearer sound.
Get a dedicated microphone for crystal clear sound
Invest in a dedicated microphone for superior audio quality, ensuring crystal clear sound in your recordings or communications. External microphones, such as USB or XLR options, often provide better performance and clarity compared to built-in device microphones.
But I don’t have a USB mic!
If you don’t have a USB microphone, ensure your built-in microphone is working properly by checking device settings. Consider using headphones with an integrated microphone or explore external microphone options compatible with your device’s audio input.
Did you fix your microphone?
If you’re experiencing microphone issues, first check if it’s properly connected. Adjust your device’s audio settings, ensuring the microphone is selected as the input device. If problems persist, consider troubleshooting hardware connections or consulting device-specific support resources for further assistance.
Frequently Asked Questions
Where is the microphone on a Chromebook?
The microphone on a Chromebook is usually located near the webcam, often at the top of the screen.
Can I use an external microphone with my Chromebook?
You can connect an external microphone to your Chromebook using the USB or audio jack ports.
How do I test my Chromebook microphone?
Open the Settings go to “Sound” and under “Input” you can test and adjust your microphone settings.
Are Chromebook microphones good for video calls?
Chromebook microphones are designed for clear communication, making them suitable for video calls and online meetings.
Conclusion
Finding the microphone on a Chromebook is a straightforward task. Typically, it is located near the camera, often in the top bezel of the screen. Users can identify it by a small opening or pinhole. Understanding the microphone’s position is essential for optimal audio input during virtual meetings, online classes, or recording.
Chromebooks are designed for user-friendly experiences, and locating the microphone is part of that simplicity. Checking the device’s manual or online resources can provide specific details for each Chromebook model.
By knowing where the microphone is, users can ensure clear communication and make the most of their Chromebook’s capabilities. Overall, finding the microphone on a Chromebook is a small yet crucial step in enhancing the overall user experience.

Lucas Steele is an experienced professional with 10 years in education. “Teachbullit” is his domain, reflecting expertise in teaching and learning.