Connecting an XLR microphone to a PC involves linking the XLR-equipped microphone to the computer by utilizing an audio interface or an XLR-to-USB adapter. This allows the microphone to capture audio signals and transmit them to the PC for recording or live streaming purposes.
Unlock the power of professional audio with our guide on how to connect XLR Microphone to PC? Dive into a seamless world of recording and streaming as we demystify the process, providing step-by-step instructions to effortlessly bridge your XLR microphone and PC ensuring crystal-clear sound for your projects. Elevate your audio game and conquer the world of digital connectivity with ease.
To connect an XLR microphone to your PC start by obtaining an XLR-to-USB adapter or an audio interface. Plug one end of the XLR cable into the microphone and the other into the adapter or interface. Finally connect the USB end of the adapter or interface to your PC allowing seamless communication between your XLR microphone and computer for high-quality audio recording.
Ways to Connect XLR Mic to PC
To connect an XLR microphone to your PC, you’ll need a few simple steps. First, grab an XLR to USB audio interface. Next, plug one end of the XLR cable into your microphone and the other end into the audio interface. Connect the USB end of the interface to your PC.
Turn on both the microphone and the interface. Check your PC’s audio settings to make sure the microphone is selected. Utilize recording or streaming software to test the microphone, adjusting volume levels on the interface if necessary.
It’s essential to place the Microphone an instrument of the right place to ensure optimal performance. Now you’re all set to enjoy clear and crisp audio from your XLR microphone on your PC.
Inline Audio Interface
Connecting an XLR microphone to your PC is made easy with an inline audio interface. Simply plug one end of the XLR cable into your microphone and the other into the inline audio interface.
This compact device streamlines the process allowing you to connect the interface directly to your PC. Now you can effortlessly enhance your audio recording or streaming experience.
Analog Audio Mixer
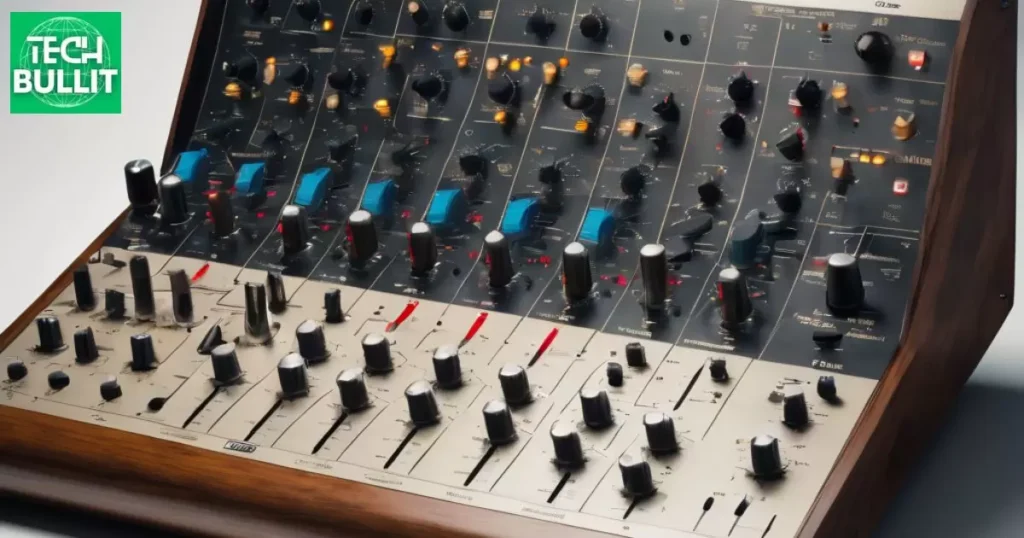
An analog audio mixer is a versatile device that blends and adjusts the audio signals from multiple sources. With physical knobs and sliders it provides tactile control over volume, EQ and other parameters.
Connecting various audio inputs an analog mixer is an essential tool for achieving a well-balanced and customized sound mix in live performances or recording setups.
Digital Audio Mixer
A digital audio mixer revolutionizes audio control with advanced processing capabilities. Operating in the digital domain, it offers precise control over numerous channels and incorporates features like effects, presets, and automation.
With intuitive interfaces and programmable settings, digital mixers provide flexibility and efficiency for both live performances and studio environments.
Using an XLR-to-USB cable
Using an XLR-to-USB cable simplifies connecting an XLR microphone directly to your computer. With one end plugged into the microphone and the other into a USB port on your computer this cable eliminates the need for additional audio interfaces or mixers.
It’s a convenient and straightforward solution for capturing high-quality audio directly onto your computer for tasks like recording, podcasting, or virtual meetings.
What to Avoid When Connecting XLR Mics to PCs
When connecting XLR microphones to PCs, avoid using unpowered adapters or direct connections to the computer’s microphone input. This can result in low audio quality and insufficient power for the microphone.
Instead use a dedicated audio interface with XLR inputs to ensure proper signal strength and optimal performance for your microphone. Additionally avoid plugging and unplugging XLR cables while the equipment is powered on to prevent potential damage to your microphone or audio interface.
Don’t Use XLR to ⅛” (Mic) Jack Cables
Avoid using XLR to 1/8″ (mic) jack cables when connecting microphones to PCs. These cables can lead to poor audio quality and may not provide the necessary power for the microphone. Opt for a dedicated audio interface with XLR inputs for a reliable and high-quality connection between your XLR microphone and PC.
Don’t Use XLR to USB Cables
Avoid using XLR to USB cables when connecting microphones to PCs. These cables often compromise audio quality and can result in issues like noise and interference. Instead use a dedicated audio interface with XLR inputs and connect it to your PC via USB for a more reliable and higher-quality audio connection.
Microphone Types
There are several types of microphones, each designed for specific applications:
- Dynamic Microphones: Ideal for live performances and recording loud sound sources. Durable and can handle high sound pressure levels.
- Condenser Microphones: Great for studio recordings and capturing subtle details. Requires external power (phantom power) and more sensitive to loud sounds.
- Ribbon Microphones: Delicate but offer a warm and smooth sound. Often used for recording instruments in a studio setting.
- USB Microphones: Plug directly into a computer via USB. Convenient for podcasting, voiceovers, and simple home recordings.
- Lavalier Microphones (Lapel Microphones): Small and clip onto clothing for hands-free operation. Commonly used in broadcasting, presentations, and video production.
- Shotgun Microphones: Directional microphones with a narrow pickup pattern. Useful for capturing audio from a specific direction, common in video production.
- Boundary Microphones: Placed on a flat surface to capture sound evenly in all directions. Often used in conference rooms and for recording meetings.
Understanding the characteristics of each microphone type helps in choosing the right one for specific recording or performance needs.
Digital to Audio Conversion
Here’s the information about Digital-to-Analog Conversion presented in a table format:
| Component | Description |
| Digital Audio Signal | Represented as binary code (0s and 1s), generated by digital devices such as computers or CD players. |
| DAC (Digital-to-Analog Converter) | Device transforming digital audio signals into analog signals for speakers or headphones. |
| Components of a DAC | – Digital Input: Receives digital audio signal (e.g., USB, optical, or coaxial inputs). |
| – DAC Chip: Converts digital signal into an analog waveform. | |
| – Analog Output: Delivers converted analog signal to audio output, like speakers or headphones. | |
| Importance of DACs | High-quality DACs are crucial for maintaining audio fidelity and accurate sound reproduction. |
| Applications | Used in various devices like music players, smartphones, computers, and home audio systems. |
| Audiophiles often use standalone DACs to enhance audio quality. |
This table summarizes the key components and aspects of the Digital-to-Analog Conversion process.
Mic Stand for XLR Microphones
A mic stand for XLR microphones is a helpful tool for musicians and pod casters. It provides a stable and adjustable platform to securely hold the microphone allowing for hands-free operation during performances or recording sessions.
With its adjustable height and boom arm users can easily position the microphone at the perfect angle for optimal sound capture.
XLR Cables
XLR cables are essential for connecting microphones speakers and audio equipment. They have three pins that securely transmit balanced audio signals minimizing interference and delivering high-quality sound. These durable cables are widely used in professional audio setups, ensuring a reliable and clear connection for a variety of applications from live performances to studio recording.
Best XLR Cables
Mogami and Canare are trusted brands for high-quality XLR cables, known for their durability and low signal loss. These cables, widely used in professional audio settings feature effective shielding to ensure clear and interference-free transmission making them ideal for musician’s studios and live performances.
How to Connect XLR Microphone to PC (or Mac)
To connect an XLR microphone to your PC or Mac, you’ll need an XLR to USB or XLR to audio interface. First, plug the XLR end into your microphone and the USB or interface end into your computer. Make sure to adjust your computer’s input settings to recognise the new microphone.
Additionally consider using recording software to optimize sound quality and adjust volume levels. Now you’re ready to start recording or chatting with clear audio on your computer using your XLR microphone.
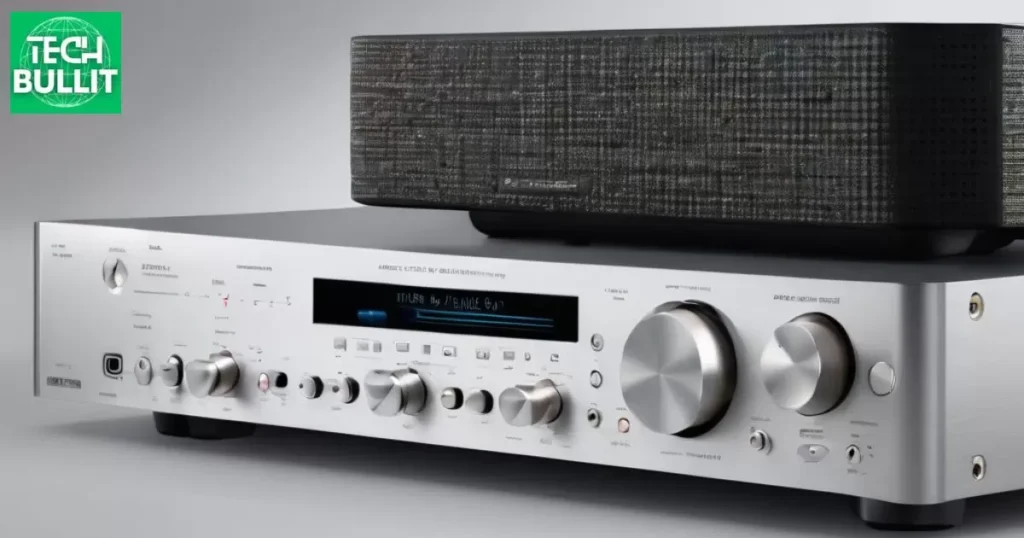
Connect Audio Interface (or mixer) to PC
Connect your audio interface or mixer to your PC by using a USB or Thunderbolt cable. Ensure proper driver installation and in your computer settings select the connected device as the default input and output for seamless audio integration.
XLR Mic to PC Equipment
Using an XLR microphone with your PC is simple. First, ensure your PC has an audio interface or a USB audio adapter that supports XLR input. Connect the XLR cable from your microphone to the corresponding input on the audio interface or adapter.
Adjust your PC’s audio settings to recognise the XLR input, and you’re ready to record or communicate with high-quality sound.
XLR to PC Topics / Chapters
1. Introduction to XLR Connectivity: Learn the basics of XLR cables and their significance in connecting professional microphones to PCs.
2. Setting up XLR to PC Connection: Explore step-by-step instructions on connecting XLR microphones to PCs including the necessary equipment and configuration.
3. Optimizing Audio Quality: Discover tips and techniques to enhance audio quality when using XLR microphones with PCs ensuring optimal performance in various applications.
Can You Plug a Microphone Directly into Your PC?
You can plug a microphone directly into your PC. Most computers have a dedicated microphone input port usually colored pink. Simply locate the port on your PC plug in the microphone’s 3.5mm jack and you’re ready to use it for voice recording or communication.
If you’re PC doesn’t have a dedicated microphone port you can use a USB microphone, which can be plugged directly into any available USB port. This is a convenient option for those without a traditional microphone input or for better audio quality.
Are XLR Microphones Better than USB Microphones?
XLR microphones and USB microphones serve different purposes. XLR mics are often preferred for professional audio recording due to their balanced analog signal providing higher audio quality.
USB microphones on the other hand are convenient for beginners and content creators offering plug-and-play simplicity without the need for additional audio interfaces.
The choice between XLR and USB depends on your specific needs and the level of audio quality you’re aiming for in your recordings.
How to Connect USB Mic to PC?
To connect a USB microphone to your PC, first, locate an available USB port on your computer. Next take the USB cable attached to your microphone and insert it into the USB port securely.
Once connected your PC should automatically recognise the USB microphone and you can start using it for recording or communication.
Remember to check your computer’s sound settings to ensure the USB microphone is selected as the input device for accurate recording or communication.
Detailed Features of XLR Microphones
XLR microphones distinguished by their three-pin connectors are renowned for delivering top-notch audio quality.
Widely employed in professional environments like recording studios and live performances these mics ensure a secure and balanced connection minimizing interference and maintaining signal integrity.
With a reputation for low-noise transmission, XLR microphones capture clear and crisp sound, thanks to their durable build and robust construction. Some models offer a cardioid pickup pattern reducing background noise while adjustable gain settings provide control over input levels.
Additionally the incorporation of phantom power supports the microphone‘s operation. In summary, XLR microphones stand as the preferred choice for professionals seeking reliable and high-quality audio recording.
Tips and Warnings
Here’s the information organised in a table format:
| Tips | Warnings |
| Use Quality Cables | Avoid Phantom Power Mistakes |
| Check Compatibility | Mind Connector Types |
| Use an Audio Interface | Don’t Force Connections |
| Adjust PC Settings | Protect Against Surges |
| Read Manuals | Consult Professionals |
Feel free to use this table for quick reference and guidance.
Frequently Asked Questions
How do I connect an XLR microphone to my PC?
Use an XLR-to-USB adapter or an audio interface with XLR input for a simple connection to your computer.
Can I connect my XLR microphone directly to the PC without an adapter?
You’ll need a device like an XLR-to-USB adapter or an audio interface for proper compatibility.
What software do I need for my XLR microphone on the PC?
Most PCs recognize XLR microphones automatically, but you may need audio recording/editing software for advanced functions.
Are there specific settings I need to adjust for my XLR microphone on a PC?
Check your PC’s sound settings to ensure the correct input device (XLR microphone) is selected, and adjust levels as needed.
Can I use any XLR cable to connect my microphone to the PC?
As long as it’s a standard XLR cable. Ensure its securely connected to both the microphone and the adapter/interface.
Conclusion
Connecting an XLR microphone to a PC is a straightforward process that enhances audio quality for various purposes. Start by gathering the necessary equipment: an XLR microphone, an XLR cable, and an audio interface or a USB audio mixer. Ensure your PC has an available USB port for connectivity.
Firstly plug one end of the XLR cable into the microphone and the other end into the audio interface or USB audio mixer. Then, connect the audio interface or mixer to your PC using a USB cable. Make sure to check that your PC recognises the connected device.
Adjust the microphone’s gain and volume settings on the audio interface or mixer to achieve optimal audio levels. Additionally, configure your PC’s audio settings to recognise the newly connected microphone as the input source.
Once everything is set up, test the microphone by recording or using it in your preferred application. Monitor the audio quality and make any necessary adjustments to ensure clear and crisp sound.
By following these simple steps, you can easily connect an XLR microphone to your PC, opening up a world of improved audio for activities such as podcasting, streaming, or professional voice recording.

Lucas Steele is an experienced professional with 10 years in education. “Teachbullit” is his domain, reflecting expertise in teaching and learning.